How To Make a Fairy Garden House from Tin Can
INSIDE: How to use a (clean) tin can for DIY Fairy Garden House. Use patio paints and floral wire to bring the fairies to your garden today.

On her 6th birthday, my daughter had a Fairy Garden party theme. I hosted a flurry of little girls in fairy wings and flower wreaths, where they created their own fairy gardens with wooden fairy houses to take home. Super sweet and the girls had a “fairy” good time!
But after our summer sun, the wooden fairy house started to show its wear. The fairy garden needed a pint-sized renovation and something able to withstand the elements.
So, I grabbed some tin soup cans, bottles of patio paint and made some weather-friendly fairy garden houses to welcome the fairies into our garden…
HOW TO MAKE A FAIRY GARDEN HOUSE FROM TIN CAN
While I don’t know too much about fairy gardens, I do know that they are very sweet, special to little girls and the accessories can be a little on the pricey side.
For the cost of a can of soup and a few bottles of craft patio paint, you can quickly and easily create a DIY fairy house for your garden today.
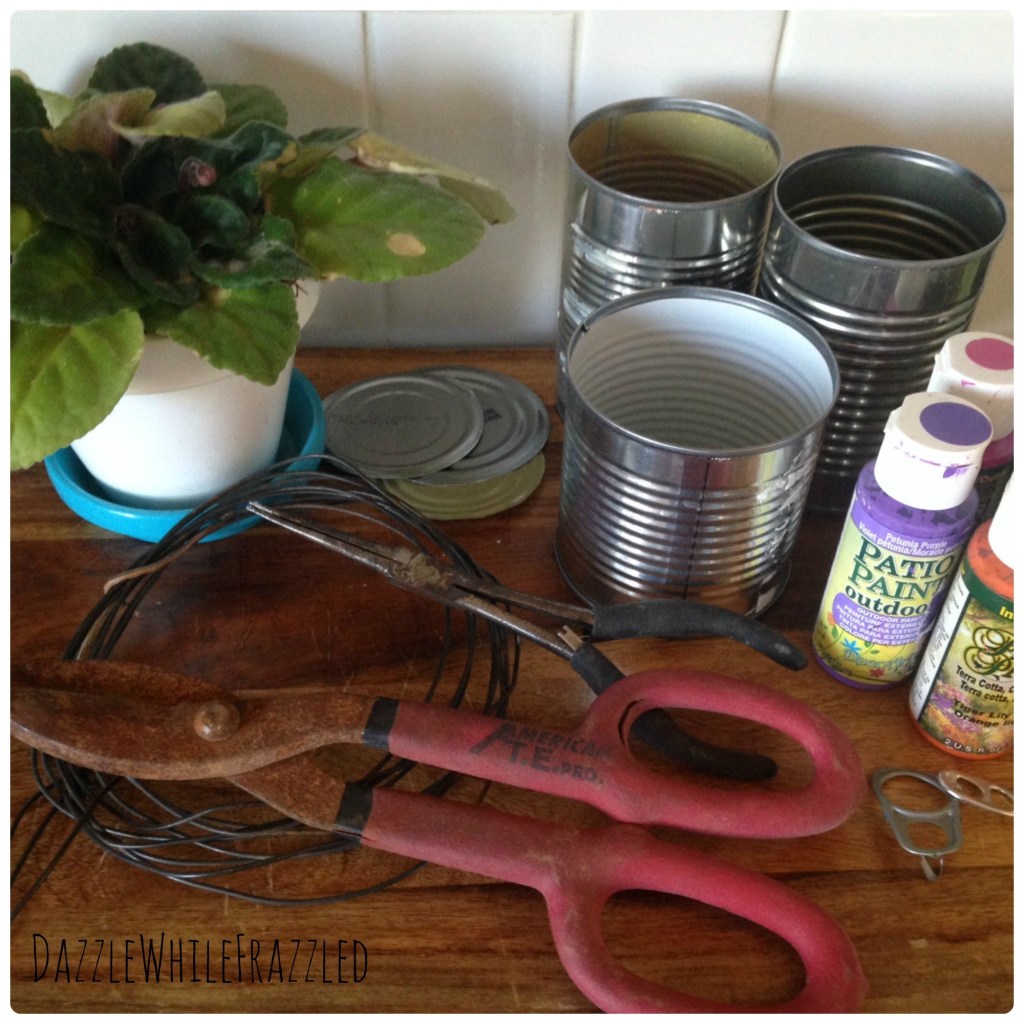
Fairy-Building Tools
– Tin cans, labels removed
– Metal cutter
– Wire pliers
– Craft patio (outdoor use) acrylic paint + brush
– Wire or floral wire
– Screwdriver (and some arm muscle)
– L’oreal Paris Excellence Hicolor Permanent Hair Color, Red Violet (optional, for added brightness)
HOW TO MAKE A TIN CAN FAIRY GARDEN HOUSE
Making a fairy house (and subsequent fairy garden) is truly a creative process. You can create it in any way you wish with whatever accessories you like. So get creative and fairy on, my friends!
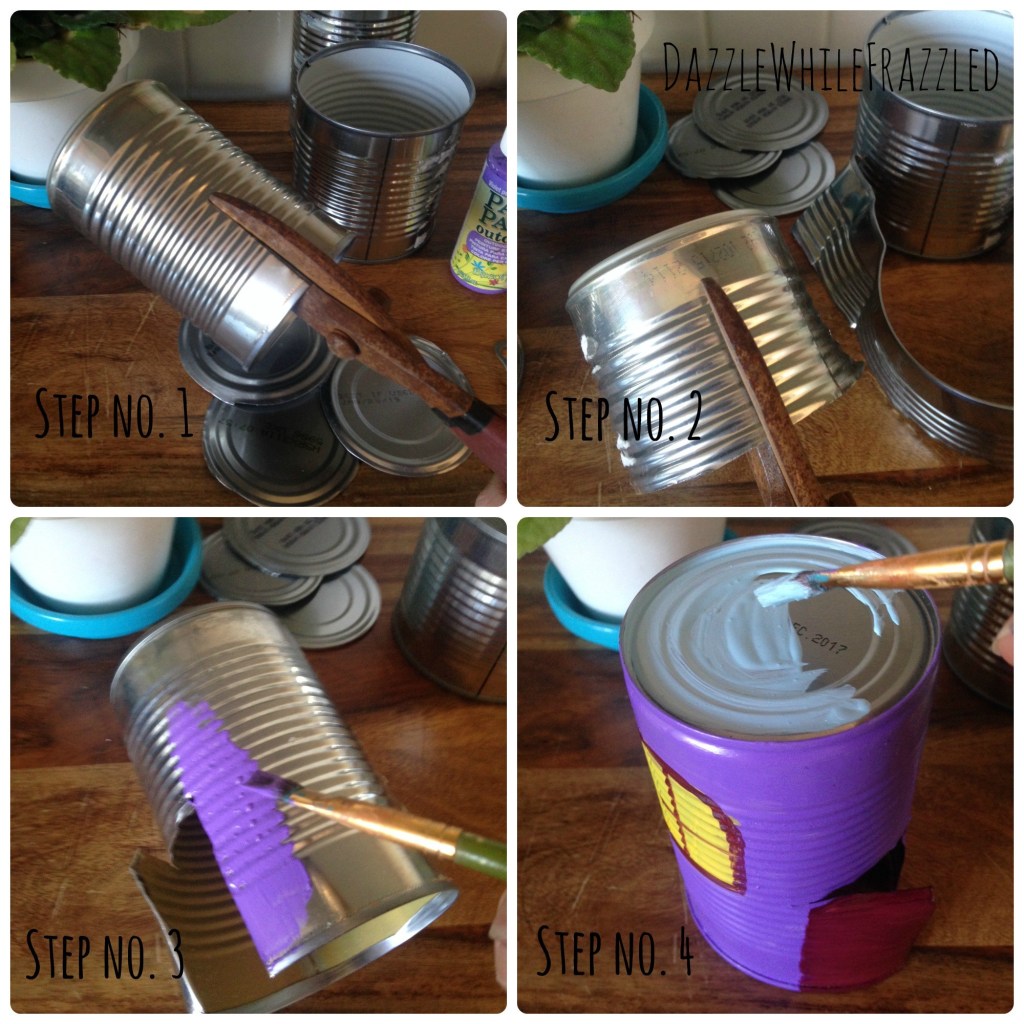
Step No. 1: Use your metal cutters to cut a door. Or, easier yet, paint on a door.
Step No. 2: Cut up a second tin can to create a roof. I cut a tin can in half and cut slits around the edge. I then bent each slit upwards. (See photo below.)
Friendly Fairy Tip: I used the wire pliers to bend back any sharp, cut ends of the can. Not worth a trip to urgent care!
Step No. 3: Paint your tin can.
Step No. 4: Add whatever creative details on your “house”.
HOW TO BUILD A FAIRY GARDEN FOR CHEAP
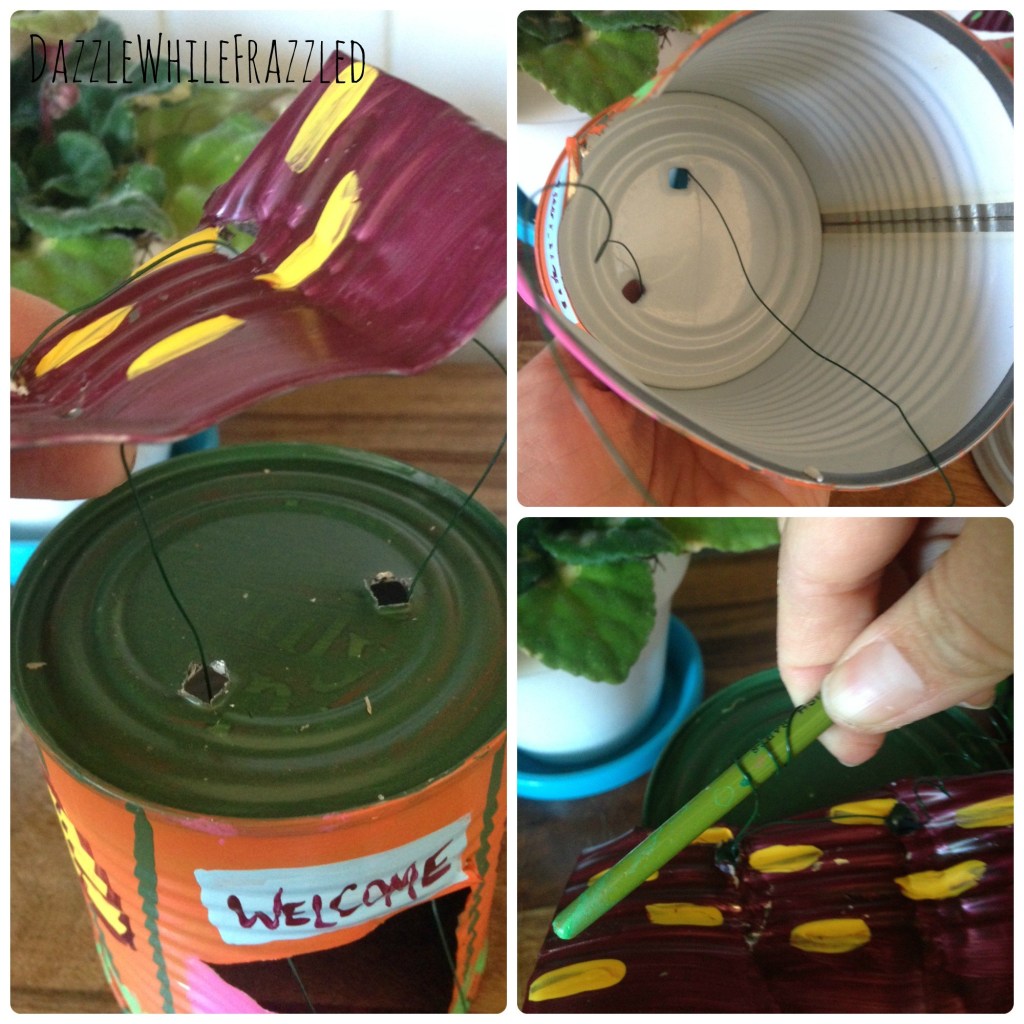
I had an extra tin can so I made a second tin can fairy house. I followed Steps No. 1-4 but tweaked the roof…
Remember we cut a tin can in half? To make this little roof, I used the second half of that can, cutting out a section.
I then relied (heavily) on my doing bicep curls a few times a week to punch two holes through this piece. I secured it to the can via floral wire and added a few curly ques for some fairy fun.
Friendly Fairy Tip: Take the piece of tin and your screwdriver outside. Lay it on the ground and push down (super) hard on the screwdriver until it punches through. Best to do this part outside on the ground so you don’t damage your floors or counter!
And here are our tin can fairy houses.
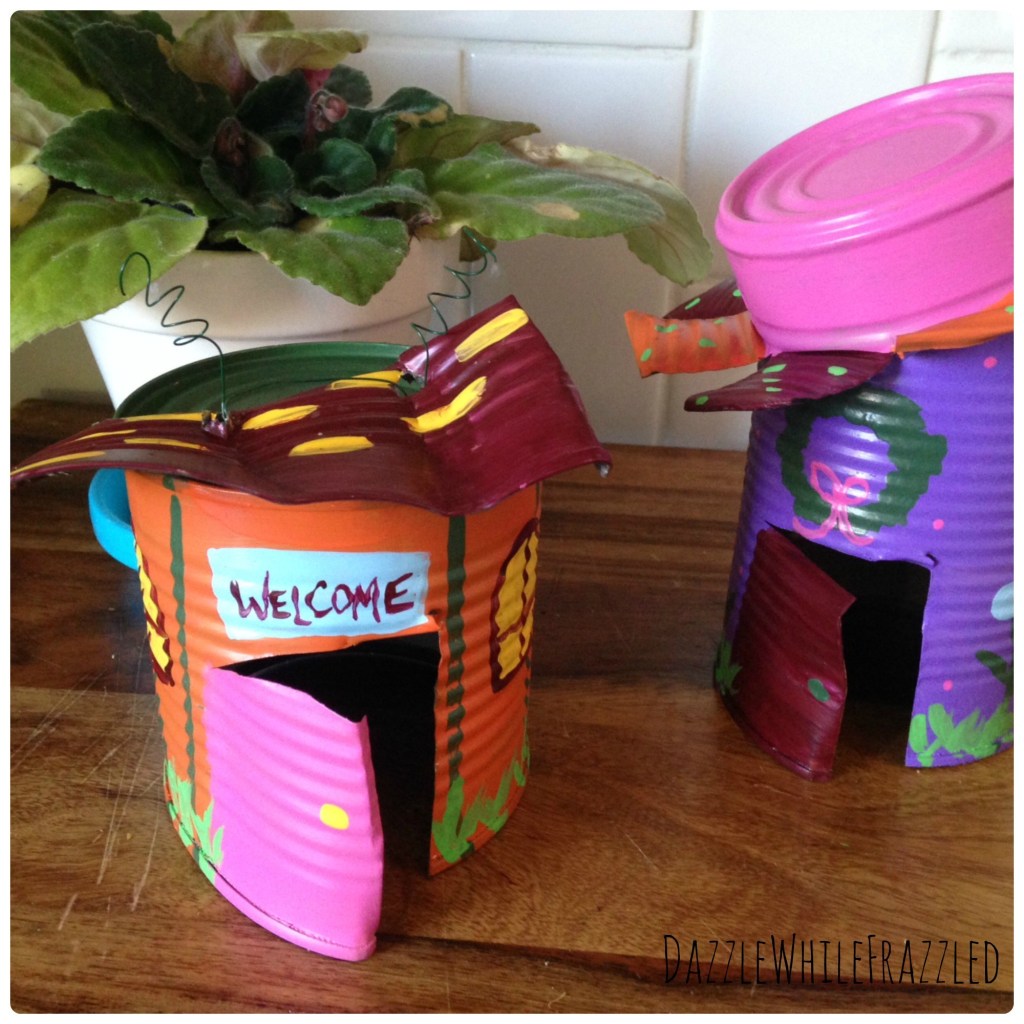
Hopefully our garden will be lucky enough to have a fairy or two stop by.
So friends, keep calm and believe in fairies. I know of a little girl who does!