How to Make Your Own Solar Lights to Hang in a Tree
INSIDE: DIY hanging solar lights in orb shape to hang in tree or for outdoor entertaining. DIY garden decor from hardware store supplies.

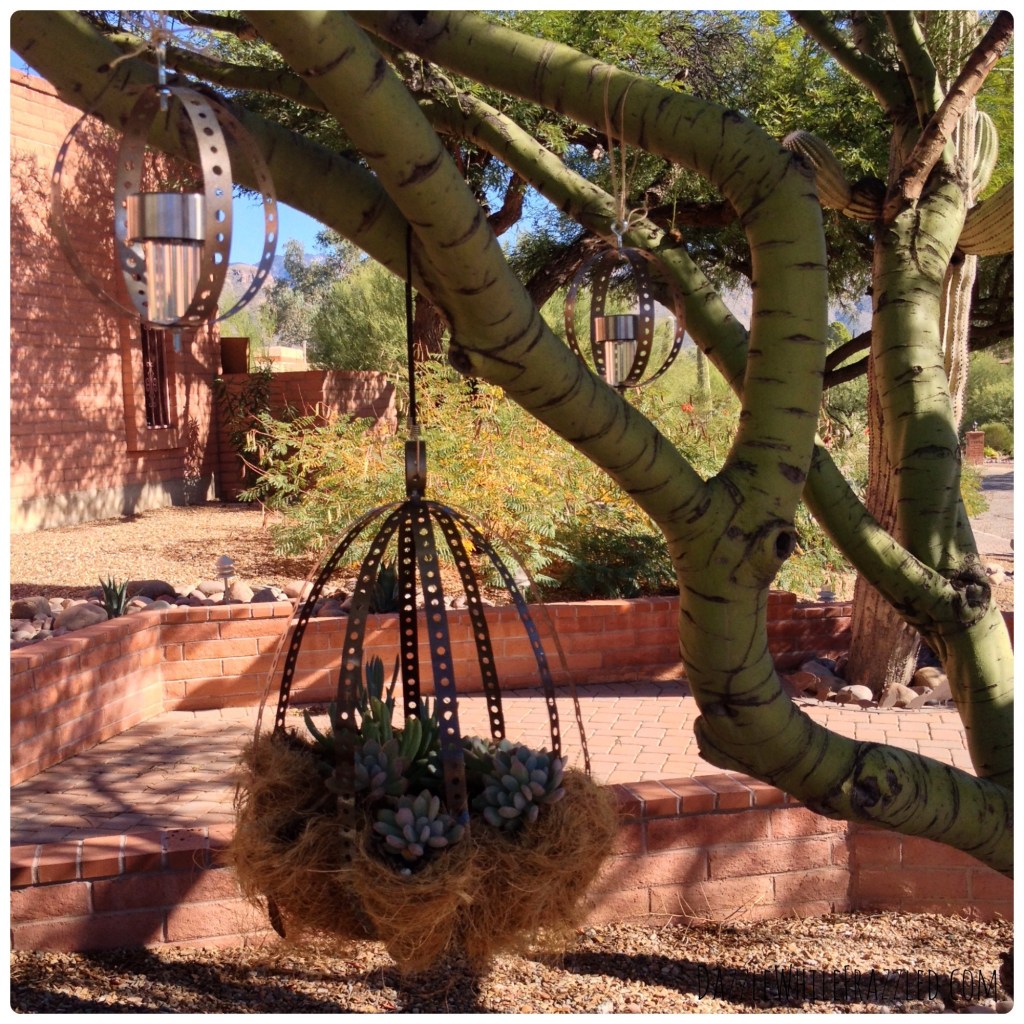
Got a tree that needs to see the light? Our front yard has several large and looming trees but only one is green. Yes, a green tree. (Hey, I live in Arizona with its own set of quirks like green trees called Palo Verdes!) So this tree is nothing short of a focal point.
A while back, I created a hanging orb plant basket to dress up this same tree. Call me biased but I think it looks pretty cool. Using the same hardware store materials, I created a series of hanging solar light orbs. And this is how I show off this green tree the light…
HOW TO MAKE YOUR OWN SOLAR LIGHTS TO HANG IN A TREE
I was originally inspired to create my hanging orb hanging plant basket following our annual summer escape to the California coast. There, I saw your typical planter basket (check out what I did with one of those planter baskets) hanging from a large tree and just loved how it looked.
Creative story later, I concocted my own hanging planter. And now with the miniature solar light hanging orbs to match.
Supplies:
– 3/4″ galvanized steel hanging tape
– 3/4″ steel screw and nut
– wire snips or heavy duty scissors
– Miniature solar lights (I used this brand and type of solar lights)
– Saw
– Drill with small drill bit (here’s a great brand name electric drill)
– Screwdriver
– 3/16″ eye bolts with nuts
– Spray paint (optional)
– Twine or jute string
MAKE SOLAR LIGHTS FOR AFFORDABLE GARDEN DECOR
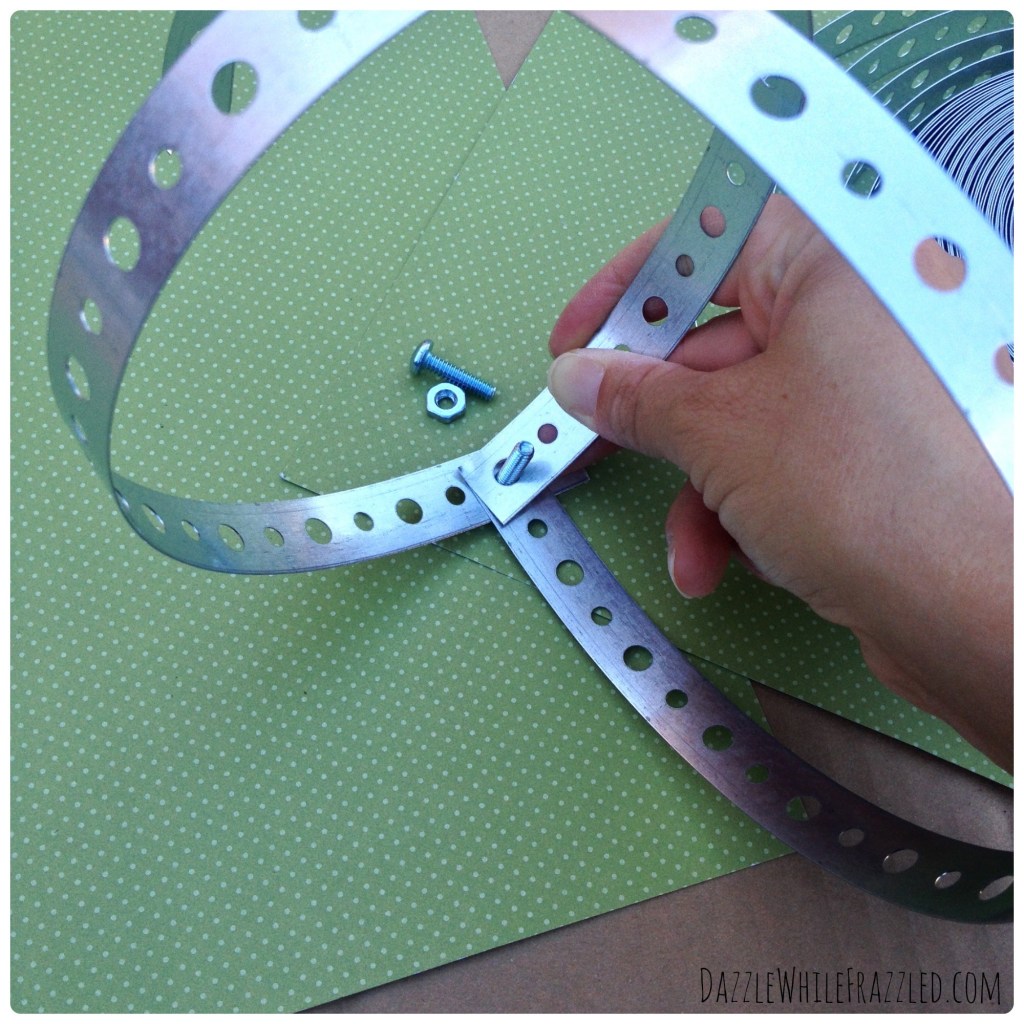
Based on the size of the solar lights you’re using, cut two strips of steel tape.
Form two circles and secure them together (temporarily) with a screw and nut.
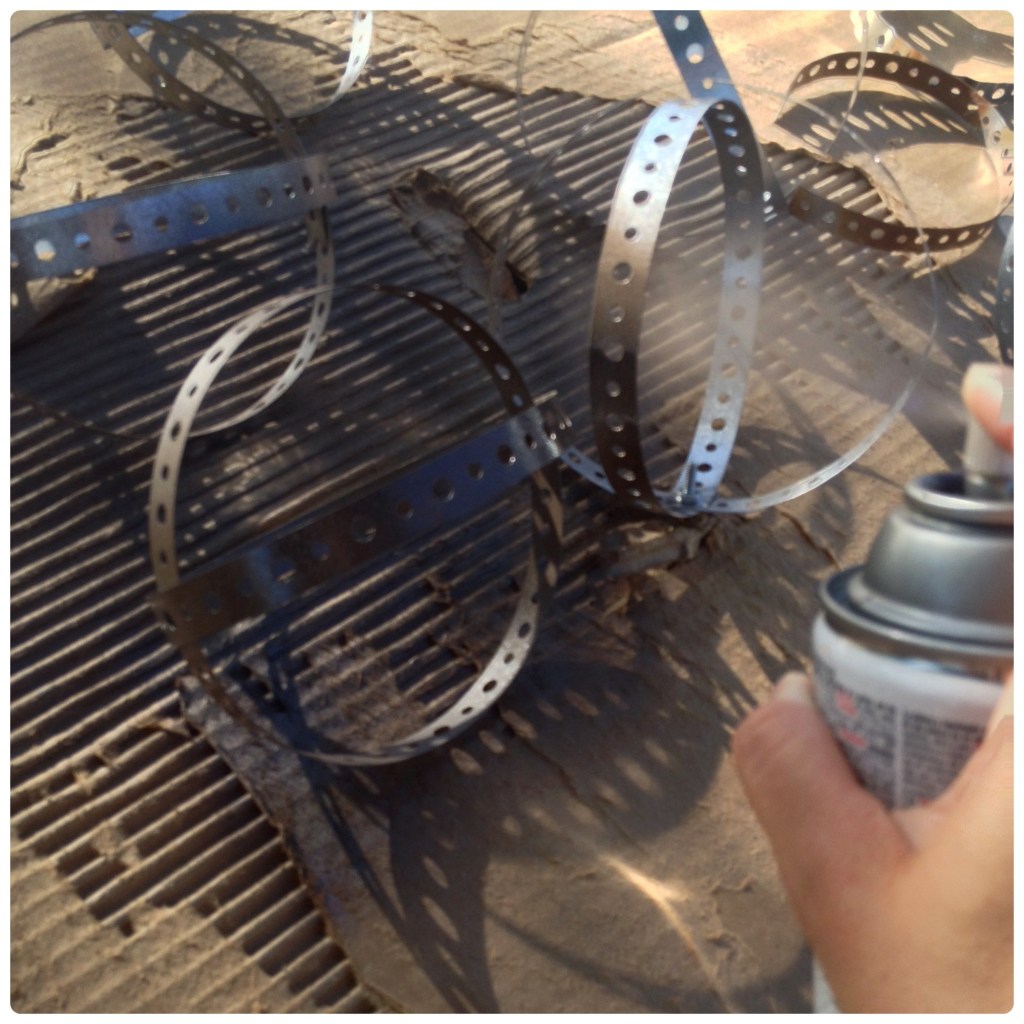
If desired, give your orbs a spray of paint. *Hello! Frazzled Moment* Let dry.
aution: Sharp tools ahead.
Using a regular ole saw, cut off the small post at the end of the mini solar light. You are cutting off the small tip that fits into the post that you stick in the ground.
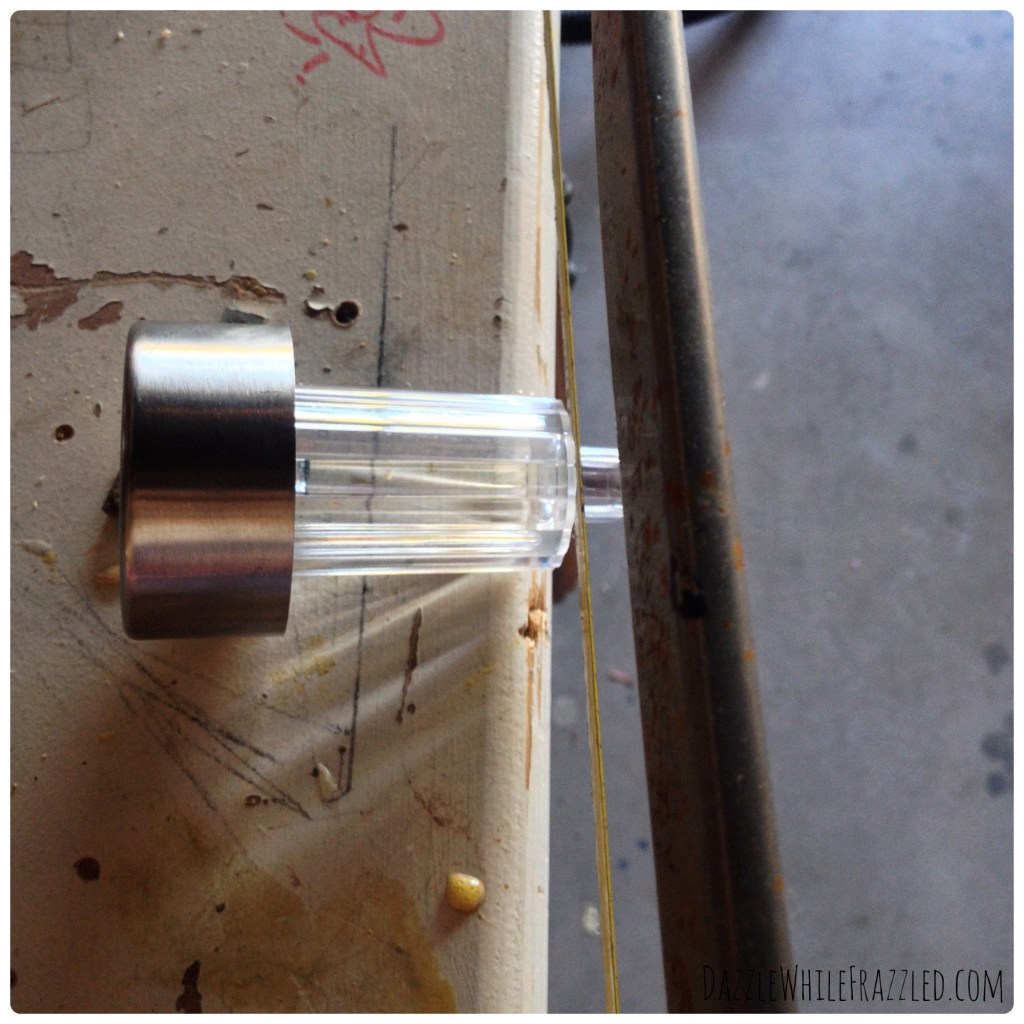
Take the solar part of the mini solar light apart.
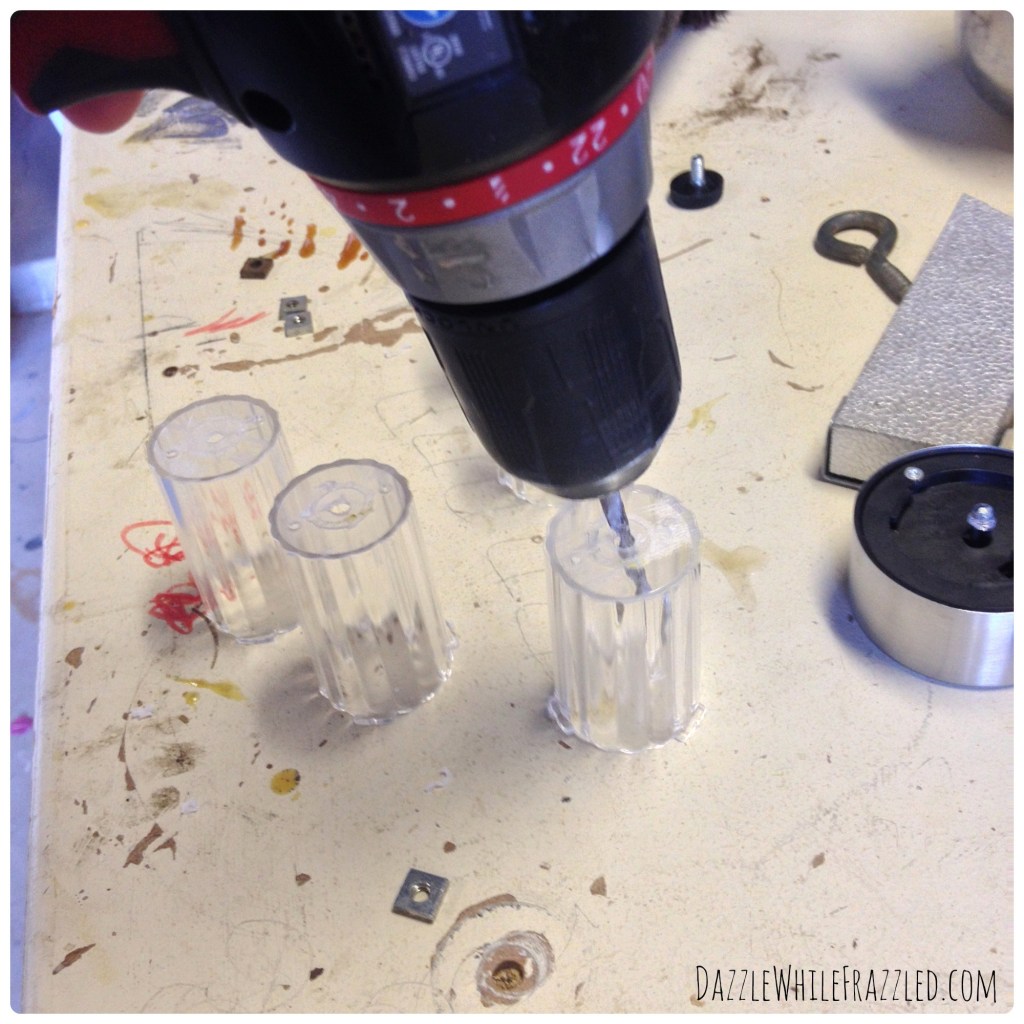
Using a small drill bit, create a hole in the flat bottom part of the solar light tube — making the hole in its middle.
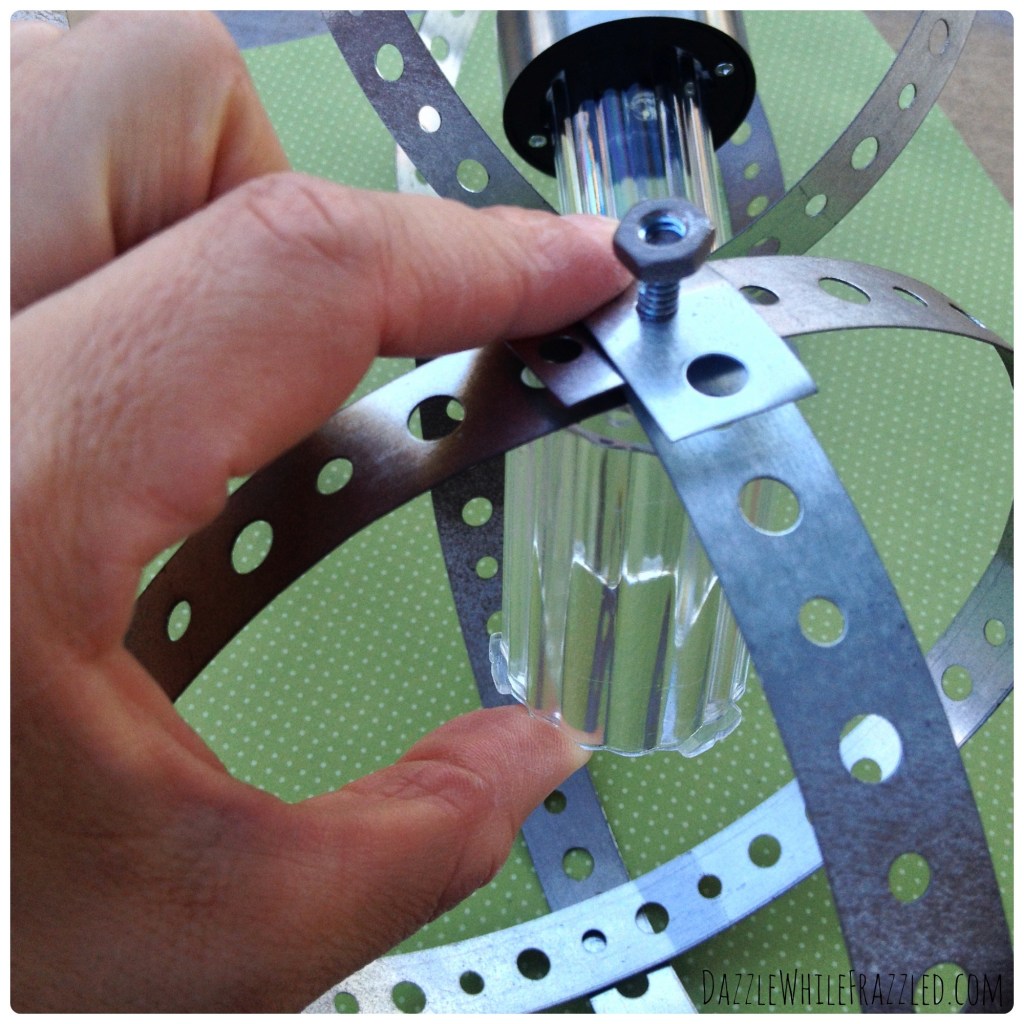
Turn the part of the mini solar light you just drilled a hole through upright.
Using a screwdriver, insert the screw through this hole and into the steel tape.
Remember the screw holding the orb together temporarily? Yeah, take that screw out in place for the screw in the mini solar light. Secure with a nut.
Flip over and put the top of the solar light back on the tube.
Insert the eye bolt through the top of the orb and secure with the nut.
Insert jute string or twine and hang over a branch.
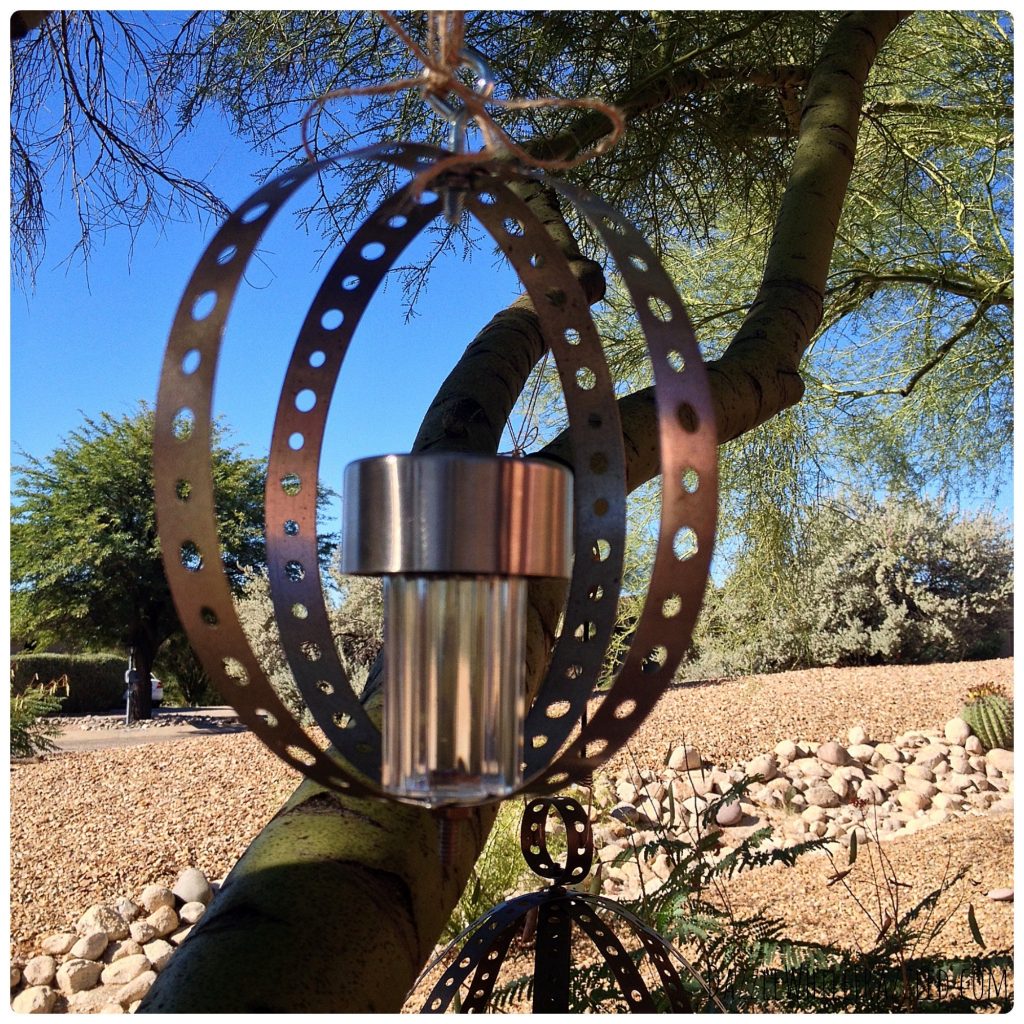
Bring on the nighttime twinkle!